[iOS][UIKit] UIViewController의 view를 CustomView로 대체하기
일반적으로 iOS 개발시 UIViewController를 상속받은 UIViewController의 view 위에서 UIView, UIButton, UITextField 등을 붙입니다.
import UIKit

final class ViewController: UIViewController {

    override func viewDidLoad() {
        super.viewDidLoad()
        ...
        let button = UIButton()
        button.setTitle("Button", for: .normal)
        button.frame.origin.x = 100
        button.frame.origin.y = 100
        button.backgroundColor = .systemRed
        button.sizeToFit()

        view.addSubview(button)
        ...
    }
}
ViewController에서 viewDidLoad 함수가 호출될 때 ViewController의 View에 우리가 만든 Custom View를 붙입니다. 생각해보면, ViewController에서 우리가 만든 View를 붙였다 땠다 하는 것이 맞을까요? ViewController의 View에 상태를 설정하면 Custom View를 ViewController가 아닌 Custom View가 붙이고 레이아웃을 설정하는 것이 맞지 않을까요?
즉, View가 알아서 Custom View를 붙이고 레이아웃을 배치해야하는 것입니다.
그러면 ViewController의 view를 우리가 만든 Custom View로 노출되게 해야합니다.
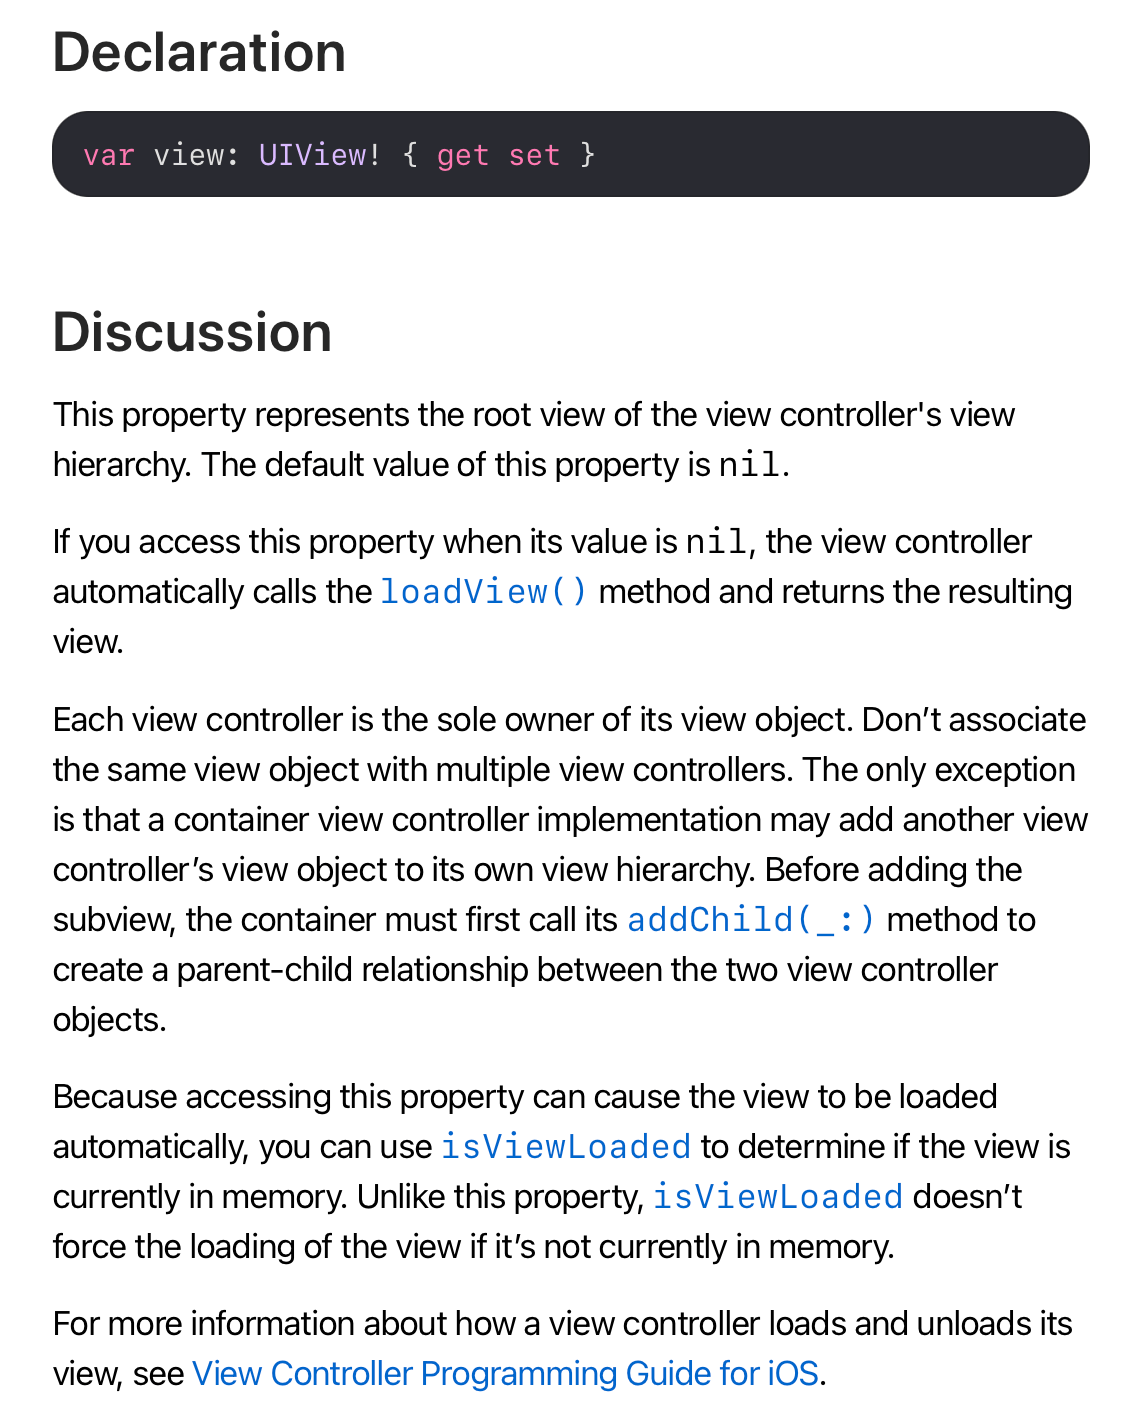
애플 문서에 따르면 ViewController의 view는 get, set이 가능합니다. view를 우리가 할당할 수 있다는 이야기입니다. 그리고 ViewController는 loadView 함수를 호출하는데, 이때 View를 만들고, ViewController의 view에 할당합니다. 그렇다면, loadView 함수에서 ViewController의 view에 우리가 만든 Custom View로 바꿀 수 있다는 이야기가 됩니다.
import UIKit

final class BlueView: UIView {
    override init(frame: CGRect) {
        super.init(frame: frame)
        setup()
    }
    required init?(coder: NSCoder) {
        super.init(coder: coder)
        setup()
    }

    private func setup() {
        backgroundColor = .systemBlue

        let button = UIButton()
        button.setTitle("Button", for: .normal)
        button.sizeToFit()
        button.backgroundColor = .systemRed
        button.frame.origin.x = 100
        button.frame.origin.y = 100

        addSubview(button)
    }
}

final class ViewController: UIViewController {
    lazy var mainView = BlueView()

    override func viewDidLoad() {
        super.viewDidLoad()
    }

    override func loadView() {
        self.view = mainView
    }
}
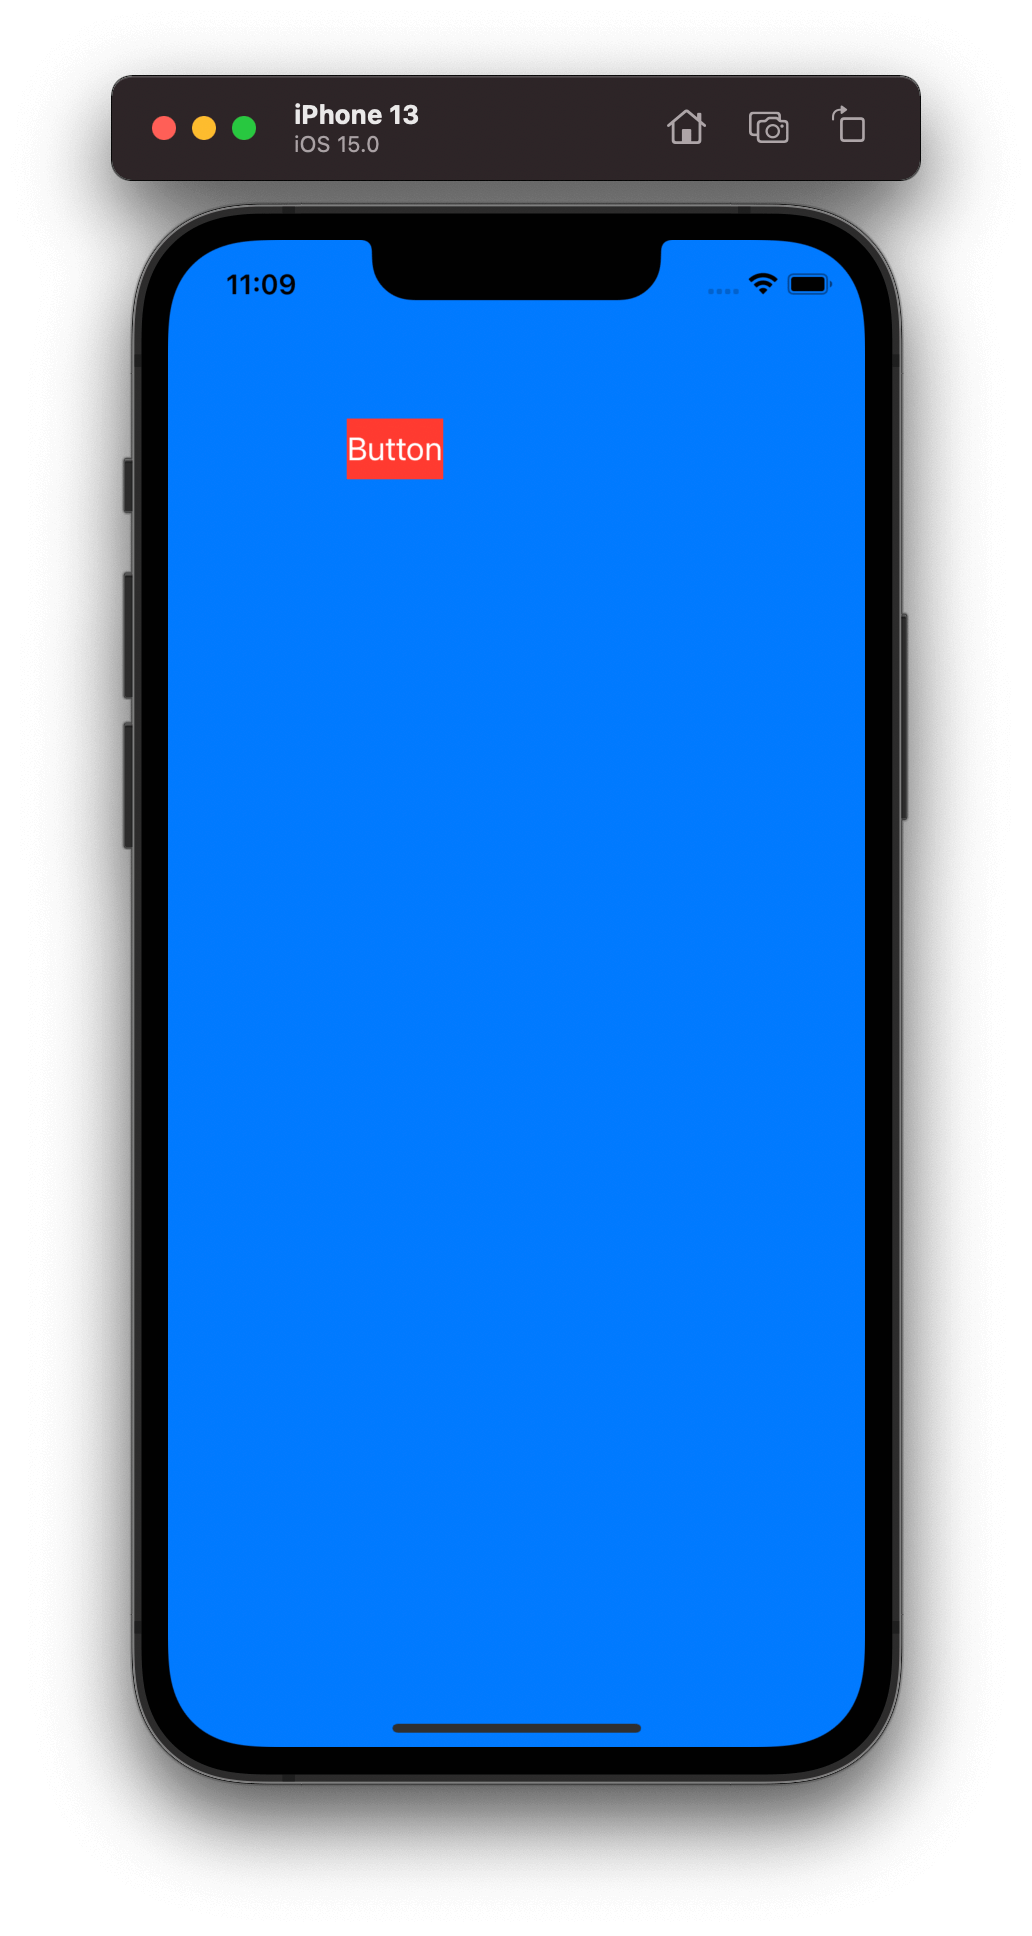
위와 같이 loadView 함수가 호출될 때, ViewController의 view를 대체할 Custom View인 BlueView를 생성하고, view에 할당합니다. 그러면 전체 화면이 systemBlue 색상에 Button이 있는 화면이 나타납니다.
따라서 ViewController는 Life Cycle을 관리하는 것만 더 집중하고, View로부터 Action을 전달받아 Interactor 등의 listener에 넘겨주고, State를 받으면 View에 필요한 State를 넘겨줍니다. 그러면 View는 ViewController에 의존하지 않습니다.
import UIKit

final class BlueView: UIView {
    struct State {
        var buttonName: String
    }

    lazy var button = UIButton()

    override init(frame: CGRect) {
        super.init(frame: frame)
        setup()
    }
    required init?(coder: NSCoder) {
        super.init(coder: coder)
        setup()
    }

    private func setup() {
        backgroundColor = .systemBlue

        button.setTitle("Button", for: .normal)
        button.sizeToFit()
        button.backgroundColor = .systemRed
        button.frame.origin.x = 100
        button.frame.origin.y = 100

        addSubview(button)
    }

    func set(state: State) {
        button.setTitle(state.buttonName, for: .normal)
        button.sizeToFit()
    }
}

final class ViewController: UIViewController {
    lazy var mainView = BlueView()

    override func loadView() {
        self.view = mainView
    }

    func update(buttonName name: String) {
        mainView.set(state: .init(buttonName: name))
    }
}
그리고 Design System에 관련된 라이브러리를 사용했을 때 더더욱 ViewController에 의존하지 않게 작성이 가능해집니다.
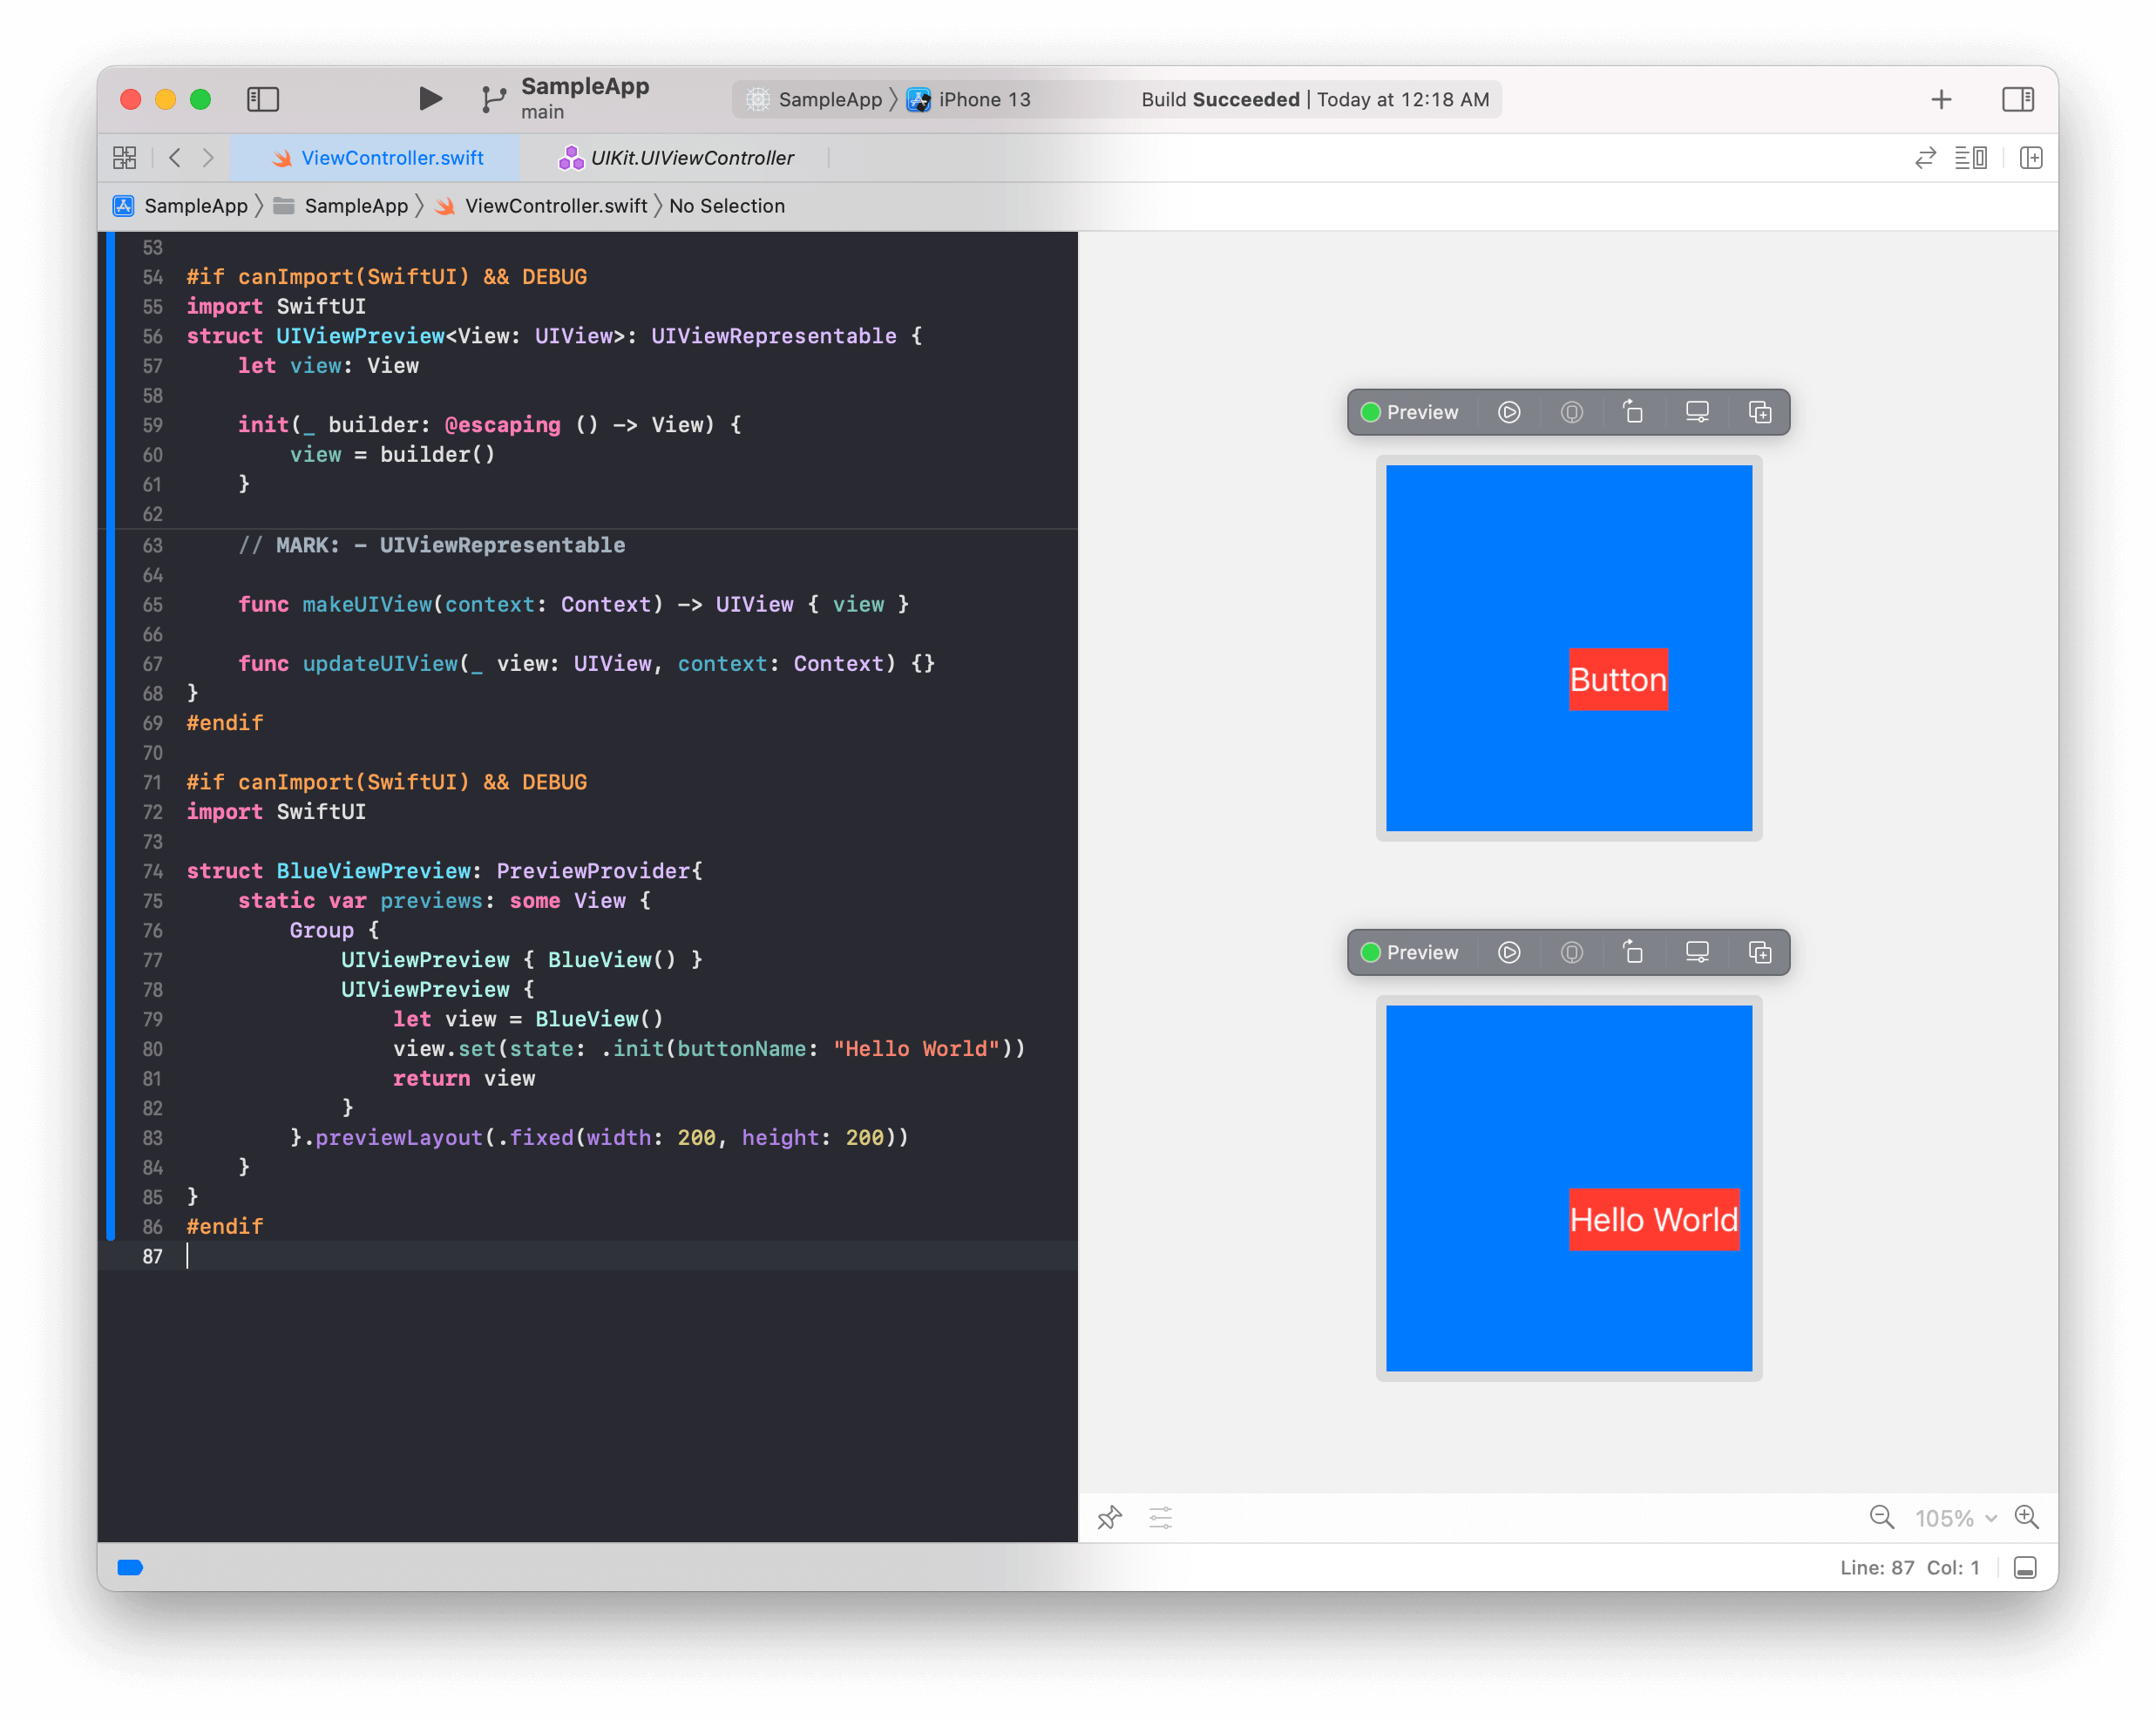
또한 단독으로 View만을 Preview 형태로도 확인이 가능해집니다. View만 Preview 할 것이므로, ViewController의 복잡한 상태를 넣을 필요가 없어지기 때문입니다.
UIKit에서 SwiftUI의 Preview 사용 방법 글에서 UIViewPreview 코드를 사용하여 다음과 같이 Preview 코드를 작성할 수 있습니다.
#if canImport(SwiftUI) && DEBUG
import SwiftUI
struct UIViewPreview<View: UIView>: UIViewRepresentable {
    let view: View

    init(_ builder: @escaping () -> View) {
        view = builder()
    }

    // MARK: - UIViewRepresentable

    func makeUIView(context: Context) -> UIView { view }

    func updateUIView(_ view: UIView, context: Context) {
        view.setContentHuggingPriority(.defaultHigh, for: .horizontal)
        view.setContentHuggingPriority(.defaultHigh, for: .vertical)
    }
}
#endif

#if canImport(SwiftUI) && DEBUG
import SwiftUI

struct BlueViewPreview: PreviewProvider {
    static var previews: some View {
        Group {
            UIViewPreview { BlueView() }
            UIViewPreview {
                let view = BlueView()
                view.set(state: .init(buttonName: "Hello World"))
                return view
            }
        }.previewLayout(.fixed(width: 200, height: 200))
    }
}
#endif
그러면 Preview에서 다음과 같이 BlueView가 출력됨을 확인할 수 있습니다.
참고
- GitHub
- Blog